Hey there, fellow farmers and agricultural enthusiasts! I'm here as a grain seeder supplier to share some tips on how to replace parts of a grain seeder. Whether you're a seasoned pro or just starting out in the farming game, knowing how to handle part replacements can save you time, money, and a whole lot of hassle.
Why Replace Parts?
First off, let's talk about why you might need to replace parts of your grain seeder. Over time, wear and tear are inevitable. The constant movement, exposure to dirt, and the stress of planting can take a toll on various components. Maybe a seed tube is clogged or cracked, or the metering mechanism isn't working as accurately as it used to. Replacing worn - out parts ensures that your seeder operates at its best, leading to better seed placement, more even germination, and ultimately, a higher yield.
Tools You'll Need
Before you start replacing parts, gather the necessary tools. You'll typically need a set of wrenches, pliers, a screwdriver set (both flat - head and Phillips), and maybe a socket set. Having a clean, well - lit workspace is also essential. You don't want to lose small parts or have to struggle to see what you're doing.
Step - by - Step Guide to Replacing Parts
1. Identify the Problem
The first step is to figure out which part needs to be replaced. Start by doing a visual inspection of the seeder. Look for signs of damage like cracks, breaks, or excessive wear. If the seeder isn't performing as it should, check the obvious things first. For example, if the seeds aren't dropping evenly, the metering system could be the culprit. You might also want to consult the seeder's manual. It usually has troubleshooting guides that can help you pinpoint the problem.
2. Order the Right Part
Once you've identified the part, it's time to order it. As a grain seeder supplier, I can tell you that getting the right part is crucial. Make sure you have the make, model, and part number of your seeder handy. You can order directly from the manufacturer or from a trusted supplier like us. We stock a wide range of parts for different types of grain seeders, so you're likely to find what you need.
3. Prepare the Seeder
Before you start removing the old part, make sure the seeder is turned off and disconnected from any power sources. If it's a tractor - mounted seeder, lower it to the ground and engage the parking brake. Clear away any dirt, debris, or seeds from the area around the part you're going to replace. This will make the removal and installation process much easier.
4. Remove the Old Part
Use your tools to carefully remove the old part. Some parts might be held in place with bolts, while others could be clipped or snapped on. Be gentle and take your time. If you're having trouble removing a part, don't force it. You might damage the seeder or the part itself. Instead, try using a penetrating oil to loosen any rust or corrosion.
5. Install the New Part
Once the old part is out, it's time to install the new one. Make sure it's the correct part and that it fits properly. Follow the reverse of the removal process to put the new part in place. Tighten all the bolts and connections securely, but don't over - tighten them. Over - tightening can cause damage to the part or the seeder frame.
6. Test the Seeder
After installing the new part, it's important to test the seeder. Reconnect any power sources and turn on the seeder. Check to see if the problem has been resolved. If the seeder is working properly, you're good to go. If not, double - check your work to make sure the part was installed correctly.
Common Parts That Need Replacement
Seed Tubes
Seed tubes are prone to clogging and cracking. If you notice that seeds aren't flowing smoothly through the tubes, it might be time to replace them. You can usually tell if a seed tube is clogged by looking for a buildup of seeds or debris inside.
Metering Mechanisms
The metering mechanism is responsible for controlling the amount of seeds that are dispensed. Over time, the gears and other components can wear out, leading to inaccurate seed placement. If you're getting uneven germination or inconsistent seed spacing, the metering mechanism could be the problem.
Disc Openers
Disc openers are used to create furrows in the soil for the seeds. They can become dull or damaged from hitting rocks or other hard objects. A dull disc opener won't create a proper furrow, which can affect seed placement and germination.


Related Agricultural Implements
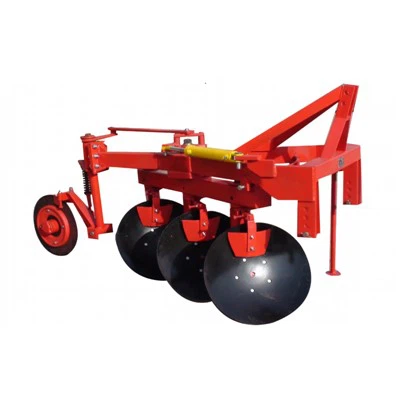
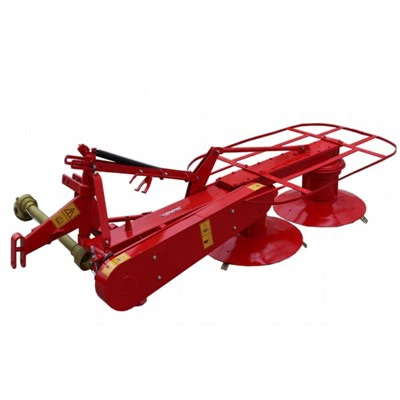
If you're in the market for other agricultural implements, we also offer a variety of options. For example, a Lawn Mower is great for maintaining the grass around your farm buildings or in small fields. A Driven Disc Plough can help you prepare your fields for planting by breaking up the soil. And if you're looking for more precise seed placement, our Precision Seeder is a top - notch choice.
Contact Us for Purchasing
If you have any questions about replacing parts of your grain seeder or if you're interested in purchasing a new seeder or other agricultural implements, don't hesitate to reach out. We're here to help you make the most of your farming operations. Whether you need advice on part selection or want to discuss a bulk purchase, we're just a message away.
References
- Agricultural Machinery Handbook
- Grain Seeder Manufacturer's Manuals
So there you have it, a comprehensive guide on how to replace parts of a grain seeder. I hope this information helps you keep your seeder in top shape and your fields productive. Happy farming!